Happy New Year my lovelies! As promised, I still have some DIY's for you, although they will be coming a little slower as work and school have grown absolutely nuts lately!
I have been OBSESSED with galaxy prints lately. Also, I've been watching a lot of video tutorials on painting glass plates. I've also been looking for a cool craft to make for my kids so they can have as much special handmade stuff under the tree as possible.
ALL OF THESE THINGS came together in one glorious project. :) And the verdict? They loved them. Click Read More for a full tutorial and more pics!
You'll want to start with the following items:
Glass platters or plates (I picked up mine at Goodwill for 99 cents each)
Americana Gloss Enamel paints
Small paintbrushes
A small foam brush
Rubbing alcohol
Something to protect your table from all the BEAUTIFUL COLORS
First you'll want to remove any stickers from the plates and clean them thoroughly with rubbing alcohol to make sure all of the grime and dust and moisture is off of them:
Take your white enamel paint and a small pointed brush and place random dots all over it. You can also use your fingernail to sort of "scrape" the brush and throw flecks and speckles all over it. I didn't do that, but I wish I had! I also did some "stars" in the middle in the shape of my kids' initials so they would be able to tell the difference between their two plates (otherwise there is likely to be bickering).
Feel free to add some little swirls of stars or clusters for faraway galaxies:
Let that dry for about half an hour. Actually you're going to have a lot of "let dry for half an hour" periods during this process so I would recommend having another project you can work on so you don't get too impatient. If you're anything like me, you will be champing at the bit to add the next part.
Now load up a half-inch paintbrush with red enamel paint:
And gently tap paint onto the plate in a swirling fashion. You don't want full coverage here, and you don't want any streaks or lines, so just dab dab dab in a few different spots until you are satisfied:
Let it dry...
Then repeat that process with purple, green, and yellow (letting it dry between each color - I KNOW IT'S MADDENING RIGHT?):
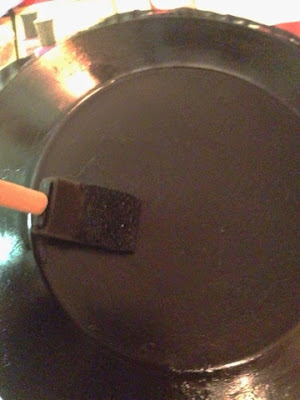
Once all of that is dry, you'll want to load up your foam brush with black enamel paint and add two thick coats of black over the top of the whole thing:
After that's dry (take a nap or something because this part will take longer to dry), flip it over for the surprise reveal!
IT LOOKS SO COOL!
OOOH PRETTY!!!
Now, the directions on the box for the paint say to let this dry for 4 days, then bake at 325F (starting with a cold oven) for 30 minutes total, BUT I have it on excellent authority that you can finalize the paint as such:
1. Let dry overnight.
2. Place plates upside down in a cold oven, close it, heat it to 325, and set a timer for 30 minutes.
3. Once the 30 minutes are up, open the oven and leave it open until the plates and the oven are cold again.
4. Repeat step 2 and 3.
Then they should be properly sealed and will be...wait for it...DISHWASHER. SAFE.
And because we were brilliant enough to only paint the BACKS of the plates, they can actually be safely eaten off of.
This was too much fun. I am going to paint ALL OF THE GLASS IN THE WORLD.
Have a great day!
XOXO


Thanks for sharing this quality information with us. I really enjoyed reading. Will surely going to share this URL with my friends. ceramic tableware
ReplyDelete