Part 4: Sleeves (this)

Welcome back to the Handmade Hell Guide to T-shirt Reconstruction!
Today we're going to talk about sleeves. Of course, you don't HAVE to do anything fancy with your sleeves when you're reconstructing a t-shirt. It's not NECESSARY. But it is probably the number one thing you can do to bring your t-shirt reconstruction from "oh that used to be a big t-shirt" to "I wonder where she bought that awesome shirt!"
Most of the tutorials covered below assume you have already Resized your t-shirt and also selected a desired Neckline. If you haven't done that yet, feel free to check out those posts and get started!
Click "Read More" for some simple (I promise!) sleeve alterations:
The Simple Tank
By far the easiest sleeve alteration in the bunch, the simple tank is really as simple as laying out your t-shirt:

Removing the sleeves and resizing using the methods described in this blog post (any of the resizing options that require removing the sleeves):

And cutting your new armholes from what you traced around your well-fitting t-shirt.

It really is as easy as that! You can adjust each armhole after trying it on if you wish to make it narrower, but as someone who really enjoys wearing a bra, this is the perfect option for me.
The Braided Strap Tank
Now I HAD pictures of this but they accidentally got deleted while I was editing all of my pictures, so I've drawn out this option for you on paper.
Lay out your t-shirt:

Remove the sleeves:

Cut away the collar and cut along your existing shoulder seams so you have two "flaps" on each side that are the same size.
As shown in the illustration below, cut each wide strap into three equal sections (front and back), then...braid them!


Sew the braids together at the top (right sides together) and you'll get this nice strappy detail that looks very polished and interesting:

The Fluttery Cap Sleeve
I don't really like standard cap sleeves because they basically still feel like the shirt is sleeveless to me...but I REALLY like the way these sleeves look:

Pretty simple stuff really - even if you've never sewn in a sleeve before!
Cut away your sleeve and resize your t-shirt. Then lay your sleeve (inside out, just like the t-shirt itself should be now) next to the armhole. Notice that the sleeve is probably much wider than the armhole since you resized the shirt:
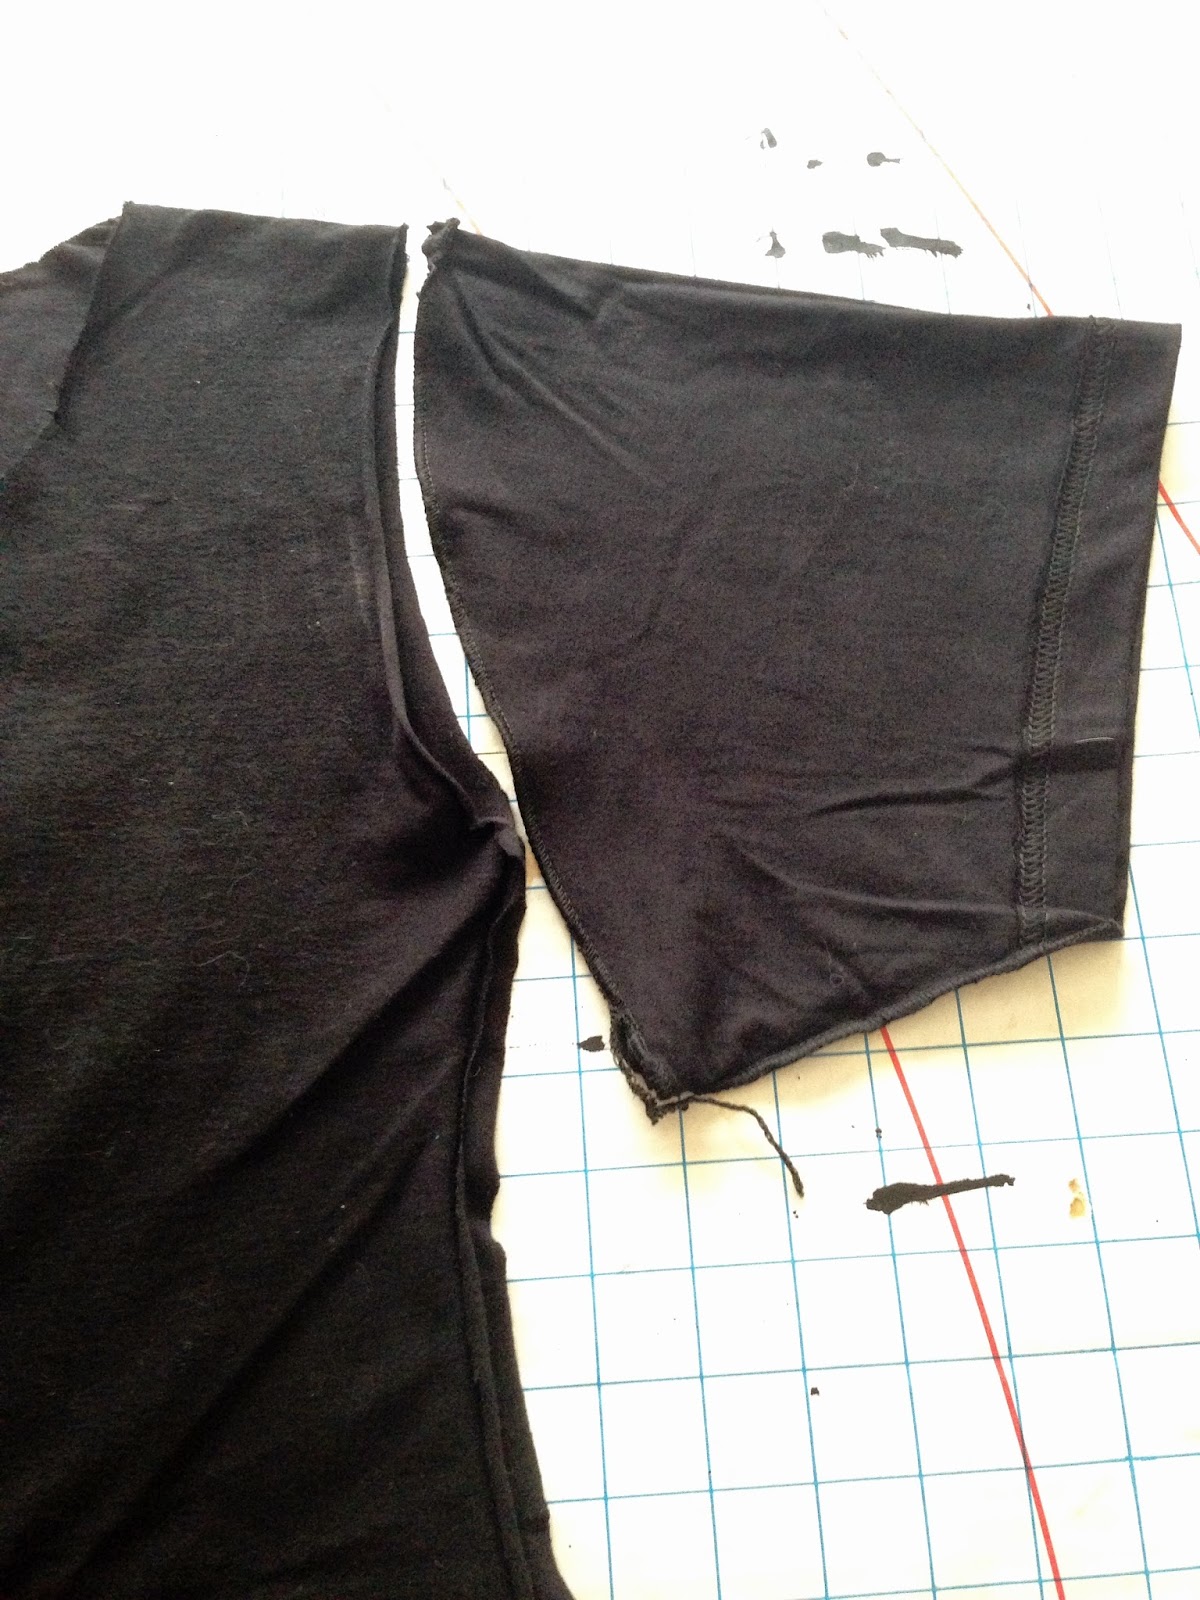
Draw a straight or slightly curved line from the bottom of your armhole up to the top of the sleeve, while it's still carefully lined up:

Cut away your excess sleeve.

You'll end up with a sort of triangle-shaped piece of fabric cut in half - the bottom part of the sleeve is no longer attached:

Now, turn the sleeve right side out and slip it into your shirt, lining up the edge of your sleeve with the edge of your armhole. Pin in place all the way around:

Then carefully, slowly, sew it in place. The two pointy ends should be at the bottom of your armhole, and the folded sleeve edge should be at the top. And now you have a fluttery cap-like sleeve!

The Paneled Long Sleeve
Possibly the most complicated thing I'm asking you to do, and don't get me wrong - I AM asking you to do this because it is SO FUN and has an awesome effect!
Use one t-shirt you want to reconstruct (we'll call it Shirt A), and one additional t-shirt in a contrasting color (let's name it Shirt B):

Remove the sleeves from both shirts and resize Shirt A to your liking. As above, line up the sleeve from Shirt B with the armhole from Shirt A. Notice that part of the sleeve is tucked underneath the shirt because it's so much bigger than the armhole now:

Remove any hemmed edge from the sleeve. Using your chalk, trace around the armhole from Shirt A onto the sleeve so it lines up exactly. Once you reach the top of the underarm seam, draw a straight line out to the end of the existing sleeve:

Repeat on the other side and you should have two pieces that look like this:

Take the sleeves you cut from Shirt A and trim away the angled part (the edge that was attached to the shirt to begin with) so that the sleeve's beginning and end are parallel with each other:

Trim away the hem from this new sleeve part. Then line it up with the sleeve from Shirt B, with the folded top edges lined up with each other exactly:

On the other side of the sleeve, draw a straight line so that the new sleeve panel is the same width as the contrasting panel, and cut that excess away.

Once you repeat on the other side, you should have two partial sleeves that look like this:

You could stop there...you COULD...BUT I NEVER STOP THERE!
Grab the rest of your t-shirt pieces and go to town!

Here's a piece that was cut from the bottom of Shirt B, roughly six inches long:

Line up the two edges with your sleeves and cut to fit the same width:

Keep goin!


If you can manage it, work it out so that the last piece of your sleeve is taken from the bottom of Shirt B so you don't have to hem your sleeves - just a little trick!

Now, as above with the Fluttery Cap Sleeve, turn your sleeve right side out and slip it through your shirt:

Line up the edges of the sleeve with the edges of your armhole and pin all the way around:

Sew in place!

Do a little dance. NEW SLEEVES YAY!!!!!

Stay tuned because tomorrow (OH SWEET FRIDAY PLEASE HURRY) I'm going to talk about my favorite subject: Embellishments!
XOXO
No comments:
Post a Comment